

Supplies:
18.5 by 18.5 square of fabric for background of block.
Strips of fabric either scraps or fat quarters sufficient to make tubes from to complete the design. Thread to match the major colors in the design
The rest of the supplies with the exception of the rotary cutter and mat are standard for all blocks.
Thread for sewing pieces, basting and quilting.
If hand sewing, a needle to sew the pieces with (I use a #9 or 10 sharp but you may use a quilting needle or some other type, whatever's comfortable for you.)
fabric for backing and batting (18.5 by 18.5 square of each minimum)
basting thread
Quilting thread (may be matching or contrasting to fabrics)
scissors, rotary cutter and mat if you have them
#9 or #10 quilting needles
thimble (should have a metal ridge around the top and should snuggly fit the second finger of the hand that you write with)
quilting frame or hoop if desired, not required.
Before the meeting:
1. Cut the fabric for the tubes into strips. The width of the cut strip should be twice the width of the finished size on the pattern plus half an inch for the seam allowance. Measure the pattern you've chosen to estimate the length needed.
2. Sew the strips together into 1 long strip for each fabric needed.
3. Fold the strips wrong sides together (right sides out) and sew the open side with a quarter of an inch seam allowance.
4. Bring the top pieces, bottom and batting squares for the block to the meeting. Also bring: thread to match all the main colors of fabric, quilting thread, scrap thread for basting, scissors, #9 or #10 quilting needles, thimble, hoop or quilting frame if desired.
At the meeting:
5. Lay the tubes in position using the pattern as a guide. Applique the tubes to the background fabric either by hand or machine.
6. Put the layers of the block together like we did the last few blocks and baste.
7. Quilt the block. Depending on your tastes, you may want to "stitch in the ditch" or you may want to use some other quilting pattern. Anything goes. The patterns from the block 1 are available if you would like to use them. You may quilt this and future blocks with either hand quilting or free motion or machine quilting, see links below for reminders on how to do these techniques.
**There are additional patterns that may be used for quilting blocks in the sections for block 7 and block 8.
If you want to join the blocks as we go, (you don't have to do this now, you can wait until the whole first row is done or even till you have all the blocks done) here is a video that will show you how to do this.
Joining Blocks after quilting
*Note - this video is part of an advertisment/instructions for a Hawaiian Quilting block pattern, just ignore the first part about the Hawaiian quilting blocks and pay attention to the second half where they show you how to join the blocks together.
Alternatively, you can go to the library and check out Lap Quilting by Georgia Bonesteel. This book has excellent drawings and pictures on how to join blocks as you go. Her other books may also have these instructions but I don't know if they do or not.
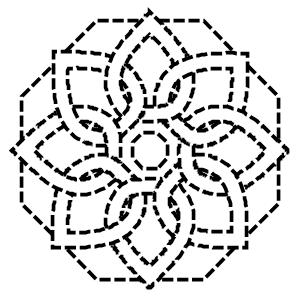
Patterns for Block 7
Right click on the picture of the block pattern you want to download. Choose "save link as" and save the file to your computer.


For more information email the Page Owner